
How to Calculate Employee Work Hours Step by Step
Want to learn how to calculate work hours? Discover top tips that can help you s...

A manager’s day is filled with all types of difficult tasks. From appeasing unhappy customers to settling issues between employees to making sure the marketing goals are on track, it seems that a manager’s work is never done.
One of the most difficult tasks by far — and the one managers often put off until the very last minute — is calculating work hours. But it doesn’t have to be this way.
We’ve created an efficient way to tackle the sometimes-Herculean task of processing your employees’ hours worked every week. All it takes to get started is establishing a few policies in your employee handbook, and you’ll be in business. Those policies include:
In this article, we’ll address each of those topics in the sections below. We’ll also show you step-by-step how to calculate the hours worked for a hypothetical employee, and how you can simplify your work life even further by streamlining the scheduling process.
All of that in one article? Sounds too good to be true. That’s Sling for you.
Before we get started on the actual process of calculating work hours, we need to address the huge purple elephant in the room that everyone wants to ignore but can’t: the law.
Table Of Contents

The United States Department Of Labor defines work hours as:
[The] time an employee must be on duty, on the employer premises, or at any other prescribed place of work.
The important thing to keep in mind about all this is that an employee’s time card (in whatever format the record of time worked takes) is a legal document. That means it can be used in legal proceedings as evidence.
The record of time worked can also be demanded and referenced by the IRS to ensure compliance with local, state, and federal labor laws. Because of this, it’s essential that you do your best to keep accurate records.
Work hours fall into one of three categories:
The definition of full-time work affects the other two types, so we’ll start there.
In the first half of the 20th century, employers could set normal work hours at whatever number they chose. That meant that employees might be required to work 50, 60, even 70 or more hours every week as standard procedure.
In 1940, the federal government passed the Fair Labor Standards Act (FLSA) to set limits on how many hours employees could work each week.
With the FLSA in place, businesses could only require their employees to work 40 hours per week. If they worked more, the employees were entitled to extra compensation (discussed in the overtime section).
The FLSA, however, did not define full-time work. It merely set limits on how many hours an employee could work each week. Businesses were free to define full-time work however they chose.
Most opted to get as many hours as they could and used 40 as their standard. Some businesses, though, have adopted lower numbers like 36, 32, and even 30 hours per week as full-time.
There is no law on the books that says what constitutes full-time work. Only that 40 hours per week is the maximum an employee can work before they stray into overtime territory.
This provides a lot of flexibility to the employer, who can set up a work schedule that benefits both the employee and the business.

As with full-time work hours, there is no legally binding number that establishes part-time hours.
Remember, the FLSA only set an upper limit on hours worked per week. It said nothing about what constituted full-time or part-time work. What it means to be a part-time employee in your business depends on how you choose to define full-time work.
If you set 40 hours as full-time, part-time is simply any number less than that. You could set it as 20 hours, 24 hours, all the way up to 39 hours.
As a general rule, managers usually hold part-time work hours at half of full-time hours (or maybe just a bit more).
So, if full-time for your business is 40 hours per week, part-time is anywhere from 20 hours to 28 hours per week.
If your part-time hours begin to rise into the mid- or even high-30s, employees begin to wonder what the difference is between the two designations.
And if your full-time employees receive benefits like insurance, vacation days, and other perks, your part-time employees who are working 32, 35, or 38 hours per week may become disgruntled that they’re doing almost as much work without the rewards.
With the establishment of the FLSA in 1940, the federal government set a limit on how many hours per week (40) employers could ask their employees to work at regular pay. Above those 40 hours, employers were now required to provide their employees with extra compensation in the form of overtime.
The standard overtime rate is 1.5 times the employee’s regular hourly wage. This number is also commonly known as “time-and-a-half.”
So if one employee makes $10 per hour, their overtime rate is $15 per hour ($10 x 1.5). If another employee makes $20 per hour, their overtime rate is $30 per hour ($20 x 1.5).
For the employee who makes $10 per hour and works 40 hours per week, their gross pay is $400 ($10 x 40). If they work any number of minutes or hours above 40 hours, you must compensate them for that work at your overtime rate.
If an employee works 40 hours and 15 minutes (40.25 hours), their gross pay would be:
Gross Pay = ($10 x 40) + ($15 x 0.25)
Gross Pay = $400 + $3.75
Gross Pay = $403.75
We’ll discuss this in more detail in the “how-to” section below.
It’s worth noting, however, that you should keep an accurate account of all hours worked — especially overtime hours. The cost of paying overtime rates on a regular basis quickly adds up and will have a significant impact on all aspects of your business, including:
Keep overtime work to a minimum whenever possible. If a full-time employee is poised to work more than 40 hours, you may want to schedule a low-hour part-time employee instead and give the full-time employee some time off.
Doing so will give the part-time employee more experience, help the full-time employee stay rested, and keep your overtime as low as possible.
Now that you understand what work hours are, how part-time and full-time play a role, and the importance of efficient record keeping, let’s delve into the step-by-step process of calculating work hours for a hypothetical employee.

For the purposes of this exercise, we’re going to create a hypothetical employee named Jane. Jane works at a restaurant where her primary responsibility is serving customers.
This job pays $10 per hour. Sometimes, though, she works as a hostess when a substitute is needed. This job pays $12 per hour. You’ll see why this is important in step four.
Each of these steps requires that you set some policies and procedures to govern the way you handle the calculation of work hours. After you set those standards, it’s just a matter of using them to do some simple math to figure out each employee’s paycheck.
Let’s look at the first step.
When you boil it down to the basics, there are three ways to record work hours:
There are numerous combinations of each method — like paper time cards for the employees and a time clock connected to a computer. You can also choose to enter time manually from a time card into a software program like Microsoft Excel.
So in our hypothetical situation, let’s say you’re using the standard time clock and paper time cards. Jane would walk into the break room, retrieve her card from the holder, and insert it into the time clock. The time clock would then record the time on the card: 8:58 a.m.
That takes us to the next important step in calculating work hours.
This may seem like a strange thing to do, but the format you choose can make your life easier down the road. The two most common time formats are standard and military.
Standard time format is what you see when you look at most clocks: the time from one to twelve. Recording standard time requires the addition of “a.m.” or “p.m.” to differentiate between morning and afternoon.
Military time counts the morning hours just like the standard format (e.g., 7:24 a.m., 9:11 a.m., 11:47 a.m., etc.). But after 12:59 p.m., military time begins counting by adding an hour to twelve. For example, 1:00 p.m. in standard format would be 13:00 in military time.
You’ll notice that you don’t need the “p.m.” to indicate afternoon as you do with standard time format. That’s because the other one o’clock (in the wee hours of the morning) is written 01:00.
Why is this important? Because it makes figuring out the hours worked super easy if you have to do it manually. We’ll use Jane as an example.
Let’s say Jane clocked in at 9:00 a.m. (standard format) and clocked out at 5:00 p.m. You’re going to have to do some roundabout math to calculate the hours worked, since you can’t simply subtract one number from the other in this case.
Now, let’s say that Jane clocked in at 09:00 (military format) and clocked out at 17:00. Calculating the hours worked becomes simply a matter of subtracting nine from 17 to get eight. Jane worked eight hours that day.
Very rarely will every one of your employees clock in and out precisely on the hour. There are going to be some people early and some people late. This is where a rounding policy comes into play.
The U.S. Department of Labor recommends keeping track of hours worked in fifteen-minute increments. Employee time from one to seven minutes is rounded down, while time from eight to fourteen minutes is rounded up.
For instance, if Jane clocks in at 07:58 and clocks out at 17:02, she’s worked for eight hours and four minutes. That would round down to a straight eight hours.
If Jane clocks in at 07:58 and clocks out at 17:10, she’s worked for eight hours and twelve minutes. That would round up to eight hours and fifteen minutes.
In some industries, like the restaurant business, employees can work different jobs at different pay rates. Remember, Jane works as a server for $10 per hour but sometimes fills in as a hostess for $12 per hour.
When this occurs, it’s important to separate each block of time into the different pay rates so she can be paid accordingly. It becomes a legal issue when you fail at this step, so if it applies to your business, we recommend prioritizing sorting work into categories.

Now it’s time to calculate a whole week’s worth of work for your employee Jane. Here’s the time card she turns in for her server job:
Monday: 09:00 to 17:00
Tuesday: 08:45 to 17:00
Wednesday: 08:58 to 17:02
Thursday: 08:59 to 17:10
Friday: 09:00 to 17:00
At this point, it’s simply a matter of going through and tabulating the hours worked. Here’s what you would get from the above numbers.
Monday: 8 hours
Tuesday: 8.25 hours
Wednesday: 8 hours (The four extra minutes round down.)
Thursday: 8.25 hours (The eleven extra minutes round up.)
Friday: 8 hours
Adding all this up, Jane worked a total of 40.5 hours as a server. Then it’s just a matter of multiplying those hours by her server pay rate of $10 per hour…with one important caveat.
If Jane actually worked 40.5 hours, you’d also need to calculate overtime for that extra half hour over 40 hours. Here’s how it breaks down.
Regular Pay = 40 hours x $10 per hour
Regular Pay = $400
Overtime Pay = 0.5 hours x $15 per hour (time-and-a-half)
Overtime Pay = $7.50
Total Pay = Regular Pay + Overtime Pay
Total Pay = $400 + $7.50
Total Pay = $407.50
Now that you’ve calculated Jane’s total pay (a.k.a. gross pay) for the week, you’re ready to move on to the next steps in the payroll process.
Before we discuss those, though, we’ll examine a way to calculate work hours if Jane worked more than one position during the week.
In step four, we mentioned the importance of sorting hours worked into categories. That becomes important when, for example, Jane works as both a server and a hostess (jobs that pay different rates). Here’s the time card she turns in when she works both jobs:
Monday: 09:00 to 12:00 (Server)
12:00 to 16:00 (Hostess)
Tuesday: 08:45 to 11:00 (Server)
11:00 to 15:00 (Hostess)
Wednesday: 08:58 to 13:00 (Server)
13:00 to 14:00 (Hostess)
Thursday: 08:59 to 10:00 (Server)
10:00 to 17:00 (Hostess)
Friday: 09:00 to 14:00 (Server)
14:00 to 17:00 (Hostess)
At this point, you will simply tabulate the hours worked. Here’s what you would get from the above numbers:
Monday: 3 hours (Server)
4 hours (Hostess)
Tuesday: 2.25 hours (Server)
4 hours (Hostess)
Wednesday: 4 hours (Server)
1 hour (Hostess)
Thursday: 1 hour (Server)
7 hours (Hostess)
Friday: 5 hours (Server)
3 hours (Hostess)
Now, separate the hours worked into categories and add them up.
Then proceed with multiplying the hours worked by the differing pay rates. Here’s how it all works out.
Server Pay = Server Hours Worked x Server Pay
Server Pay = 15.25 hours x $10 per hour
Server Pay = $152.50
Hostess Pay = Hostess Hours Worked x Hostess Pay
Hostess Pay = 19 hours x $12 per hour
Hostess Pay = $228
Total Pay = Server Pay + Hostess Pay
Total Pay = $152.50 + $228
Total Pay = $380.50
If you’re keeping track of the total pay per position (for all employees), you would cut two separate checks for Jane — one for server pay ($152.50) and one for hostess pay ($228).
Or, if this distinction isn’t important for your records, you can just cut one check for the total pay ($380.50).
Sometimes, employees forget to clock in or out, or there are other errors on the record. When things like this happen, it’s important to let the employee know what you’re doing with her time card and have her initial the change.
For example, let’s say Jane clocked in at 09:00 but forgot to clock out when she left. Standard policy for your business is to assume 17:00 unless otherwise indicated by a manager. You would need to let Jane know that you’re writing 17:00 on her time card and have her initial it for verification.

After you calculate work hours — and the gross pay that goes with it — you’re ready to take the next steps in the payroll process.
Here’s how to proceed.
Voluntary deductions are dollar amounts that an employee elects to have subtracted from their gross pay to fund things like:
Depending on the type of business you run, you may not offer any benefits at all. In that case, you won’t have to worry about the majority of these voluntary deductions.
You will, however, always need to check the employee’s W-4 to see if they want extra taxes taken out of their paycheck.
If you fail to withhold those extra taxes from an employee’s wages, your business could be held liable for the money by state and federal agencies.
The IRS bases the penalty for this kind of oversight on the lateness of the payment (in days), so it behooves you to verify that you’ve deducted the right amount for each employee every time you run payroll.
Let’s work through an example so you understand how it works. We’ll do so using Jane’s gross pay from the one-position-worked calculations mentioned earlier ($407.50).
According to your records, Jane has opted for the following voluntary deductions:
The total of those deductions is $60.
From there, you would simply subtract the total amount from Jane’s gross pay.
Gross Pay After Deductions = Gross Pay – Total Deductions
Gross Pay After Deductions = $407.50 – $60
Gross Pay After Deductions = $347.50
With that number in hand, you’re ready to move on to the next step.

Calculating taxes and subtracting them from your employees’ paychecks is one of the most important parts of the entire payroll process.
If your numbers are incorrect — or you don’t do them at all — your business can face significant legal trouble and hefty fines down the road.
The best way to ensure that you use the right numbers, calculate taxes correctly, and are in compliance with all local, state, and federal laws is to talk to an attorney or an accountant familiar with your business and the area in which it operates.
So, for example, your business may need to calculate and remove dollar amounts for:
(Please Note: This is not an exhaustive list of all the taxes that may apply to your business.)
Continuing with Jane’s numbers from the previous step, we’ll work through the FICA deduction to show you how it’s done.
According to the IRS, employers must deduct a total of 7.65% from each employee’s paycheck for this tax. That breaks down into 6.2% for Social Security and 1.45% for Medicare.
With those numbers in mind, plug everything into this equation:
After-Tax Pay = Gross Pay After Deductions – (Gross Pay After Deductions x 7.65%)
After-Tax Pay = $347.50 – ($347.50 x 7.65%)
After-Tax Pay = $347.50 – ($26.58)
After-Tax Pay = $320.92
Once you’ve deducted all the taxes required by local, state, and federal law, you’re ready to move on to the final calculation of the payroll process.
At this point, you’ve calculated gross pay (including overtime), applied voluntary deductions, and subtracted taxes from the total.
The last bit of math left to do is to determine net pay (or the amount of money left after subtracting mandatory expenses).
Crunching the numbers to reach net pay involves subtracting any other mandatory expenses your business might have, such as:
When you’ve removed any of these expenses from the after-tax gross pay, the rest belongs to the employee.
For example, let’s say that your business charges employees if they break a dish while at work. Jane did so during this pay period so you would need to deduct $5 to cover this expense.
Your business also has a tip-pooling program in place, and Jane’s share for the pay period is $10.
When you’ve added up all the mandatory expenses, subtract them from Jane’s after-tax pay from the previous step.
Net Pay = After-Tax Pay – Other Mandatory Expenses
Net Pay = $320.92 – $15
Net Pay = $305.92
That number — $305.92 — is the total dollar amount you would print on Jane’s paycheck for this particular pay period.
The last thing left to do in the employee-facing part of the payroll process is to write checks and distribute them on payday.
When it comes to distribution, every business has a different method. Even within a single business, employees may choose to receive their paycheck in a different manner.
Common methods of payment include:
Distributing wages via physical check is one of the most popular methods in the United States.
Businesses may choose to have an HR manager walk around and distribute the paychecks to each employee personally, have employees report to a set location at a certain time to pick up their checks, or mail the check to the employee’s home.
As we mentioned earlier, your business can even pass out checks all three ways.
For example, your business may:
It all depends on what works best for your team and your business.
Some businesses still use cash as their method of payment, but it’s becoming less and less popular because it’s not as secure as the other methods on the list.
Direct deposit is a popular method of distributing paychecks because it’s secure, doesn’t require physical supplies, takes less time, and, in some cases, costs less overall than passing out physical checks.
Some employees don’t like passing out their bank account information, so some businesses offer both options — direct deposit or payment via a physical check.
A payroll card (or pay card) is a prepaid card that employers can use to pay employees. Each payday, your business loads the card with the employee’s wages for that pay period.
Employees then have several options for accessing the funds:
One of the nice things about using a payroll card to pay your employees is that they don’t need a bank account to receive their wages.
Another distribution method that has increased in popularity in recent years is mobile wallets like Venmo and Apple Pay.
If your business chooses to use this method, on payday, you would deposit an employee’s wages into an electronic account that they access and control through an electronic device, like a smartphone, tablet, or computer.
Now that you’ve gone through the process to calculate work hours and distribute the net pay to your team via one of the methods mentioned above, you may think your job is done.
As an employer, though, your responsibility doesn’t stop there. There’s one more important step that all businesses must perform.
After you’ve gone through all the math necessary to calculate and deduct payroll taxes from each employee’s paycheck, you must send those taxes to the proper authorities by the required due date.
Most taxes are due by the 15th of the following month — e.g., June taxes are due by July 15th — but be sure to consult with an attorney or an accountant in your area.
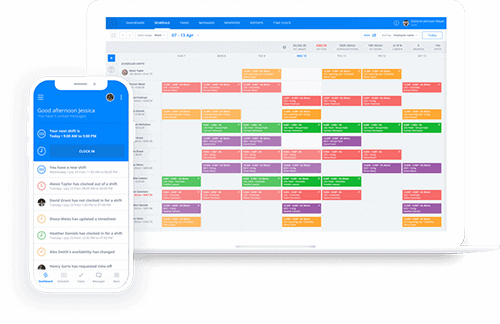
You can get a sense of the hours your employees are going to work — and make your work life less stressful in the process — by using a scheduling tool, like Sling, to organize your employees.
With Sling, you take the guesswork out of scheduling and calculating your team’s work hours. Everything related to time on the clock is tracked down to the minute, so you’re free to focus your attention elsewhere.
No more worrying if you’ve missed a step or are out of line with labor laws.
To learn more about how the right scheduling tool can simplify your work life, check out GetSling.com.
The Sling app is designed specifically for streamlining the scheduling process, so all of its tools are dedicated to that task. Sling can also help you avoid conflicts by providing:
Sling even provides features that help you distribute your schedule efficiently, keep it up to date, find substitutes, and communicate with your employees. It really is the total solution for bringing your staff together, keeping everyone informed, and building a more productive team.
To learn more about how the right scheduling tool can simplify your work life, check out GetSling.com.
See Here For Last Updated Dates: Link
This content is for informational purposes and is not intended as legal, tax, HR, or any other professional advice. Please contact an attorney or other professional for specific advice.

Schedule faster, communicate better, get things done.