
How To Create An Effective Project Management Plan
Creating an effective project management plan may seem like a daunting task — ...

If you want your work projects to be successful, you need to plan and prepare for what lies ahead. That’s why a project plan template is vital for any and every project — no matter the size or scope. With a good project plan template, you can account for all the details, formulate and schedule all the steps along the way, and execute each piece with exacting accuracy.
But how does a busy manager go about creating the perfect project plan template? In this article, the management experts at Sling show you six easy steps for planning even the largest project.
By definition, project planning is the process of establishing the following aspects of any task:
Project planning is a key component of project management (the very first one, actually), and sets the stage for everything that comes after it. The end result of the project planning process is a project plan template.
A project plan template is a document that describes the scope and objective(s) of a project and the steps you and your team will take to satisfy those variables.
In the early stages, you’ll use a good bit of text to describe the details of your project plan. But in later stages, it will be more useful if you translate that text (tasks, dates, time spent, etc.) into a visual like a Gantt chart.

Think of this step as getting the big picture. You, as the project manager, need to understand what the major deliverables are. You should have a general idea of how you and your team are going to get to those deliverables, as well as how long you have to get the job done (the deadline).
After you have a firm grasp on the project at hand, it’s time to get specific and delve into the finer points of what lies ahead.
The research stage is where you gather together all the facts about the project. You haven’t started writing your project plan template yet, but you’re getting closer.
You should ask plenty of questions — of yourself and your clients — during the research stage in an attempt to get a sense of details such as:
Once you have that information, it’s time to put pen to paper. For that, you’ll need a project plan template.
Don’t be afraid to ask tough questions about sticky or sensitive issues. Broaching these issues shows that you’re not afraid to talk frankly, that you have the experience to handle any size project, and that you care about the client and want their project to run smoothly.
We’ve included this as a separate step in the project planning process because it’s often better to ask these questions in a one-on-one situation.
You’ve already met with all the stakeholders. Now set aside some time to talk with your main client contact to find out about the process, general risks, organizational politics, personalities, and anything else that might influence the way you work.
Here are some examples of questions to ask before creating your project plan template:
After you have a firm grasp on the project at hand, it’s time to get specific and delve into the finer points of what lies ahead.
The research stage is where you gather together all the facts about the project. You haven’t started writing your project plan template yet, but you’re getting closer.
You should ask plenty of questions — of yourself and your clients — during the research stage in an attempt to get a sense of details such as:
Once you have that information, it’s time to put pen to paper. For that, you’ll need a project plan template.
The goals for your project should span a wide range of activities. Of course, you’ll have the major project targets, such as first iteration, final product, and launch. But you should also include smaller goals for the project itself and your team.
Examples of goals for your team include:
And anything else that you as project manager deem crucial to the success of your team and the project as a whole.
These goals will help you establish a clear picture of what you need to do to keep everyone — team members and stakeholders alike — on the same page and moving forward with the work at hand.

As you set goals for your project, you’ll likely have a rough outline of what you and your team need to do first in your head. Obviously, sub-team formation and organization will come before any actual work commences. But the next step after you set all your goals for the project is to prioritize them and create a general timeline of task completion.
For example, if one of your goals for a specific project is to incorporate a new piece of software, can work commence on an old piece of software while your team learns the new tools? In that case, mastery of the new software will have less of a priority.
If, however, the new piece of software is integral to the workflow, learning said software has to occur before work can proceed. That changes the priority of this goal significantly.
Every goal along the way should lead to some sort of deliverable. Establish exactly what these deliverables are before starting the project itself. Yes, the original deliverables may change along the way, but knowing what they’re working toward can help your team stay on task and on time.
In the early stages, deliverables will often be intangible. In app development, for example, finalizing color scheme might be one deliverable. User interface (UI) design might be another deliverable. At first, these pieces in the project chain may be nothing more than drawings on a whiteboard.
In the later stages, deliverables take on a more substantial feel. In app development, a working user interface might be one deliverable while a functioning e-commerce platform might be another.
Your deliverables will depend on how involved the client wants to be and what they would like to see along the way.
A project plan template is basically just a form where you can record all the details you’ve decided on in steps one and two.
Below, we’ve created a very basic project plan template so that you can get an idea of the information that needs to be included. Feel free to use this project plan template as is or modify it to accommodate your project.
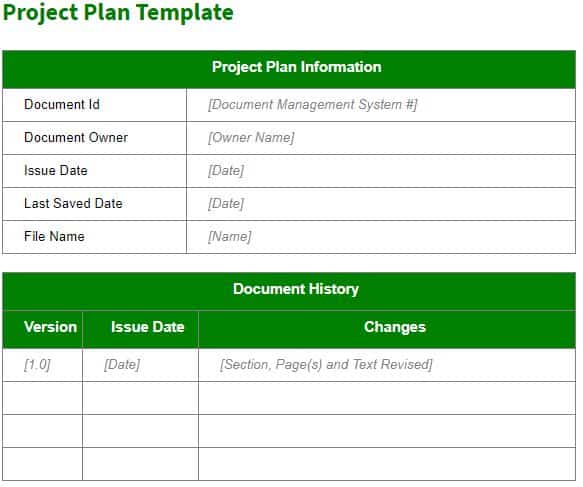
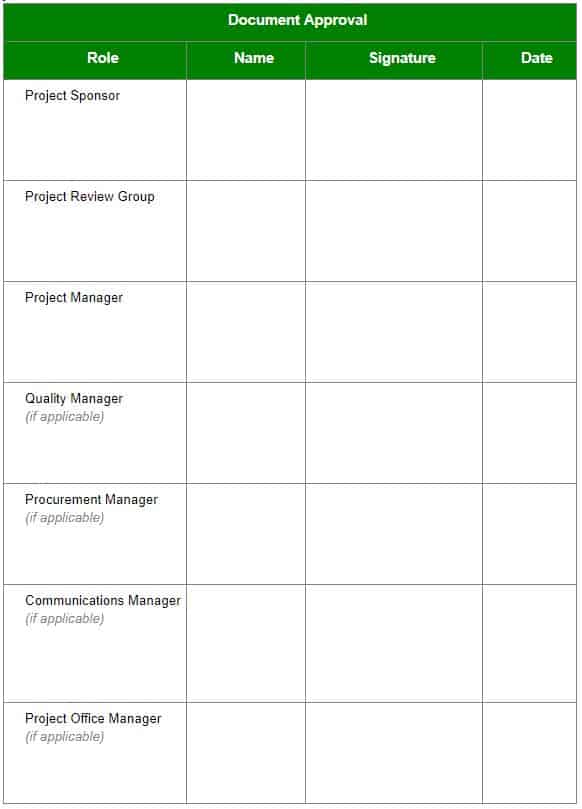
You should fill in as many of the details as possible, but realize that this is not the final copy. That comes later. In the meantime, use this version in the next step of the process.

Now it’s time to meet with your team, present them with the basics of your project plan, and get their input and feedback. This meeting serves multiple purposes:
It may take several meetings with your team to get to the point where you’re all satisfied with the project plan. When you are, it’s time to move on to the next step.
Very few projects are without risk. You’ll ensure your success (or at least smoother sailing) if you identify potential problems and pitfalls before you begin.
Are there major holidays coming up that will affect production? What will you do if you can’t get the parts needed to meet a deadline? What happens if your lead programmer gets sick and is off work for a week?
Once you’ve identified potential problems, establish solutions to those issues so that, should they occur, you know exactly what to do to keep the project moving forward.
When you write your project plan, do your best to keep it as simple as possible while still incorporating all essential information.
Key features of any good project plan include:
That may sound like a lot of information — and it is — so it’s crucial that you put a premium on organization and presentation.
Rather than writing pages and pages of text that describe your project plan, consider a visual representation of the data whenever possible. Images, tables, and charts speak volumes at a single glance and make it easier for readers to understand what they need to do.
After you’ve met with your team and are in agreement as to the particulars of your project plan, and after you identify risks and solutions, it’s time to finalize your project plan and create a schedule.
Transfer the information on your project plan to a simple table like the one below.
At the very least, be sure to include:
We recommend creating the schedule above in a spreadsheet program. You can also download pre-made templates from the internet. You can then use the data in your schedule to produce a visual representation of the entire process.
We’ve formatted ours as a Gantt chart because they are easy to understand. You can produce your perfect project plan in whatever format works best for you and your team.
Now that you’ve got your project plan template finalized, it’s time to meet with your stakeholders again.
During this meeting, describe all aspects of your plan so that everyone has an understanding of the whole project. Explain how you will address expectations, goals, and deliverables. Outline potential problems and the solutions you’ve devised should they occur.
After everyone is satisfied with the project plan template, establish roles (i.e., who is responsible for what) so that everyone is clear on what they need to do. Consider such questions as:
In the process, make sure all stakeholders know what’s expected of them and what they have to do at each stage of the project.
Once you have your ideal project plan in hand, it’s time to execute. Distribute the plan to all your team members and give them the green light to get started.
Be sure to monitor your team’s progress and keep them engaged so that they meet all the deadlines you’ve outlined in the plan.
Even after you execute your project plan, it’s vital to understand that even the best-laid plans are not set in stone. They can, and will, change — sometimes on a moment’s notice. But with a good team and a clear understanding of the project at hand, you can refine your plan to handle any bumps along the way. That’s a recipe for success.
For more free resources to help you manage your business better, organize and schedule your team, and track and calculate labor costs, visit GetSling.com today.
See Here For Last Updated Dates: Link
This content is for informational purposes and is not intended as legal, tax, HR, or any other professional advice. Please contact an attorney or other professional for specific advice.

Schedule faster, communicate better, get things done.